Faux Wood Paneled Wall — Without the Wood!! Happy New Years!

CAM00962

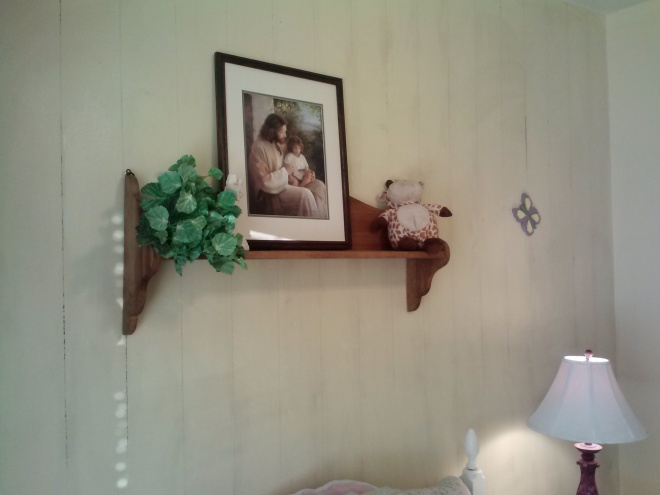
Up close view of the “woodless” wood paneled wall!

CAM00963

Another shot…. it is really hard to get a good picture in this room. It is so bright with the sun coming through the window.

How about we go out in 2014 with a bang!!  Boy, howdy, when my dear husband realizes how I did this project, it just might really be a bang!  I told him that I painted a wall in my daughter’s room, just not quite, HOW, I painted said wall!  This was done in a super flash yesterday (I NEEDED to be done before Ed got home!) and I haven’t really dared look at it all that much since then.  But, this morning, with the sunlight coming through the window, I stood back, took a deep breath, and realized…. IT TURNED OUT TOTALLY AWESOME!!!!   I have wanted wood paneled walls on this wall for some time.  And with the cheap paneling, surely $40 to $50 is not too bad of a price for that type of project… but I have NO cash for projects right now, and my dear husband has NO time to help me out.  I searched and searched for any faux methods out there.  I have had this crazy little idea popping in and out of my head for some time now…. I thought surely there was some other individuals out there on the blog world who had thought of this crazy-fool idea!  But, to my searching, I can’t find ANYONE red-necked enough to have tried this idea!  What can I say, desperation is a great motivator!!   Well, enough with the words….My sister told us bloggers to dispense with too many words and get to the meat, so, dear Heidi, let me tell you how I did it….

DISCLAIMER… IF you try this on your walls…. I can not be held liable for ANYTHING…. Just sayin’!  Make sure you never want to change them, or at least if you do, you consider re-mudding, paneling, or wallpaper as a cover up option.  Are you scared yet?  You should be!!

I was too scared during the process to take any pictures… sorry!  I started by marking off every six inches top and bottom.  I had my two boys help me with the chalk line.  We chalked every six inches down the wall.  I then took a 4-ft level, and a sharp nail…. yah…scary part.  Then I scored the wall down those chalk lines.  After a few deep breaths, I finally got comfortable with it.  A big mistake was scoring it too much…. you only want to run your nail over it once or twice.  Just barely make a line.  You can see some places that are darker than others… I got a little carried away with the scoring.  After it was all scored, I took a glazing liquid that I have had for years, black in color, and I mixed it with some water.  I took a rag and dipped it into the glaze and spread it over the walls… remembering to work in small sections at a time.  Let it sit for about three to five minutes, then came back over it with a wet clean rag…I found that I needed to rinse my rag out quite frequently to avoid too much glazing being spread around.  I also found that wiping it from side to side, rather than top to bottom worked best to settle it into the grooves.  It left the glaze right in those little scored grooves.  I intentionally left a small amount of the glazing all over the wall. It seems to give it an antiqued wood paneled look.   CAM00964

I wish the pictures were better, because they really don’t give it justice, but, not to shabby for a red neck!!!

Faux Brick Wallpaper!

If you’ve read much of my blog, you would know that a few months ago, I decided to try to paint brick on my kitchen back-splash.  While it turned out, OK, there was something that was just bugging me about it.  I guess it looked too “fake” to me.  I didn’t know what to do.  I didn’t want to sound ungrateful, nor did I want to throw all the hours of my work away–believe me it took a long time to do that little paint job!  I debated about whether or not to make it look like board and batten or to put bead-board paneling up there, since I had some left over from some previous projects; but, I knew that it was going to require a super busy husband to get that up.  Not knowing what to do, I started looking around for some ideas.  Well, the other day I happened upon an Ebay store that was selling their faux wallpaper and this particular pattern happened to be nearly 50 percent off!  Wallpaper!!!  I can do that and by my self, too, might I add!  No husband required!!!  And 50% off is a pretty sweet deal!  It got here within three days!

So I put the the little ones to bed that night and went to work!  My kids all thought it was either real or that their mother was an incredible artist!  Wish that it could be the latter, but oh well!!  So without further delay, here is my before and after kitchen back-splash.  Perhaps someday when we have gotten our children into the mission fields, and there is a little extra to spare, we’ll go with real stone, but until then, I am going to enjoy my brick back-splash!

103_0687

This is what I painted on. It was just OK… I think I made the mortar too thick. Perhaps this is what was bugging me. Too much white!

103_0686

And the after:

103_1102

It gives it a much more “softer” look. I guess more of a Tuscan feel. Check out my black stove we found on the classifieds. We spent two weeks cleaning and scrubbing the living tar out of it. We held our breath when we went to go hook it up. We didn’t know if it would work but it did and I love it! We are slowing changing things over to black!  I even wrapped the inside of the windows where the brick was.  It gives it a three-dimension look!  This stuff is so cool!

103_1099

Another close-up of the brick.

103_1103

I even put some up in my laundry room. I have an area where I have a counter space and some hanging cupboards above it. It looks really cool! Sorry, no picture of that one yet!

UPDATE:

103_1115

I found a different style and did my fireplace wall as well!  Unfortunately, AFTER I had hung it all up, my daughter sat there looking at it and then asked me if I had hung it upside down…… Uuummmm…. Yep!  Sure did!  Good grief!

DIY Faux Garage Window/Carriage Kit!

This is seriously one of the EASIEST DIY ideas I have EVER tried…. AND, coming in at under $15, one of the BEST ideas out there!!  It seriously requires no power tools or husband to complete!!!  I have wanted carriage kits for my garage door for a LONG time; however, even at $25, just for the hinges, it is not in my budget with only one income and seven hungry kids!

I thought about making a stencil and painting it on there with spray paint; however, at the risk of really messing things up, I couldn’t get myself to do it.  What if Ed didn’t like it?  You know, he has to live here too!  He’d has to like the way things turn out also!  I got to looking around on the internet to see if there was something I could find and one idea that kept coming up was VINYL!!!

So, when my friend found some vinyl on sale for me at $5 a roll, I couldn’t be more pleased!!

I simply cut out 32 squares that were 7 1/4″ long by 3 1/2″ wide (It only took 2 roles that were 12″ by 48″ long for the windows and a small partial role for the hinges).  Placed them squarely on the raised panel part on the garage door.  For the hinges and the handles, I found a picture of the ones I liked, blew them up on the printer at 200%, then cut those out.  I also took a hole punch to the end of those to make a nice little hole in the hinges and handles…

We purchased a total of three rolls and I have a bit left over, so I might get a start on the shed garage door.  I think Ed will like it…. a lot!

UPDATE: September 2015… Well, my sweetheart didn’t complain about the doors.  We liked them a lot!  However, after about a year’s time, the vinyl started to peel.  I still loved the look so I taped it off and painted it black with some outdoor black paint I had.  Same great look…. much longer lasting!

103_0580

Let me know if you decide to give it a try!

One “before” and a few “afters!”

103_0576

103_0580

103_0579

103_0578

UPDATE:  I had enough to do my shed door as well!  The last window is sort of pieced together, and we had to forgo the hinges, but I still think it looks great!  So for three rolls of vinyl, I did a double garage, and a single garage door!

103_0581

Toothbrush Board Mount — Pinterest Successful Project!

Well…. I’m sure you’ve all seen them.  There’s tons of pictures out there…. All over Pinterest!  How do people organize their toothbrushes…. Let’s take that one step further…. How do you organize toothbrushes for at least SEVEN people PLUS their flossers?  We’re talking at LEAST 14 spots.  Pretty darn sure they don’t make toothbrush holders that big!

Anyways, I decided to give it a try.  In our house, the toothbrushes for Ed and the kids are used in the 1/2 bath by our back door.  This is because people are usually rushing out the door for work or school right after breakfast and this is a good location for me to help supervise the smaller ones.  We needed something.  I had toothbrushes crammed in a tiny little jar…. half of the time I was confused as to who’s toothbrush belonged to whom?  I know…. not good!  Something had to change.  In my quest for organization, I decided to give this Pinterest project a try.

I found a stud right close to my mirror (PURE, dumb luck!) and I screwed a piece of cedar fencing material to it–which I have had hanging around the garage for years.  If I ever wanted to take this thing down, I would only have two small holes in the wall from the screws.  It hung there in the bathroom for a couple of days until I got all the supplies.  The funny thing was this…. Ed NEVER once asked me why there was a board screwed to the wall in the bathroom.  I think he was simply too scared to even ask what kind of hair-ball idea I had this time!  A couple of days later, I finally found my hose clamps and 1/2 pint canning jars.  I used very short screws to screw the hose clamps onto the post.  I was only able to fit seven on there, but since I usually brush my teeth in my bathroom, and Mattie is still very little, that’s OK!  I have one for Ed and six children.  This way, they know where their stuff is and can put it right back when they’re done!  So far, no toothbrushes have been left out on the counter!  I’m sure that will change when the novelty wears off, but at least I will know who didn’t put their stuff up!

100_5702

This is a close-up. You need to tighten the hose-clamps as tight as you need them BEFORE you screw them into place, otherwise, it will not hang where you want it to.

100_5700

Another view…. Seven in a row!  The names are only temporary.  Until they learn where their jar is.  I didn’t want to put names directly ON the jars, as I know they will need to be washed every so often!

100_5701

One final close-up!

It was so simple and so easily done!  When Ed saw it, he even thought it was a “nifty” idea!  So, I would have to say that this Pinterest idea, IS A WINNER!

Our Laundry Method–for NINE people!

I all too often, as I’m sure many of you do, find myself wishing that I had an AMAZING laundry room like this one on the left!  One filled with TONS of room, counters, folding tables, built-in ironing boards, and wash basins.  Some even have those fancy little desk areas in them!  I wonder if they really use those rooms for laundry or if they are just for show and tell…. really!

However, I don’t!  I live here on Earth.  We have what’s called Real-Life, and it sure as tootin’ isn’t that type of a laundry room.  It’s a real work room.  If I had a dime for every load of laundry washed, my husband could retire as a rich man.  So, I find myself wondering often about different ways to do laundry.  I’ve tried many, trust me!  However, there is a method that I have been doing for a few years now, and it is simply the easiest for our family of nine!  It has become even more easy since the purchase of a few more little wire shelf units and a drill.  I’ve always been told, that if you don’t have the floor space, go up.  It is so true!  It’s amazing how good things work when you can get them up and off the floor!  I was so tired of not having room to do my laundry  IN MY LAUNDRY ROOM!  I would always wash and wash and wash, then bring all my loads into the family room to fold.  Man, was that a nightmare!  It would sometimes sit in there for days, OR worse, my kids would get a wild hare and start throwing clean laundry at someone or burying themselves UNDER the laundry in an effort to hide themselves, and before I knew it, it was either a Mount Everest, or a Tsunami wreck in my family room.

So without further delay, I am going to show you my laundry room in all it’s working glory…. please don’t mind the paint… someday I want to change it!  Also, don’t look at the nail holes that have been filled but not repainted over yet — I’m terrible at finding studs…. Lots of “Oops!” moments!

100_5571

This is a taller shelf…. I put the empty baskets up there when they are not in use. The spray wash, laundry soap, and dryer sheets are kept on the lower shelf for easy access.

The laundry soap is kept on the shelf for easy access.  I just refill it as needed.  I also keep the dryer sheets and the spray wash right on the same shelf.  I’m trying to help the kids to know that if a stain does get on their clothes, that when they take it to the laundry room, all they  need to do is just grab the stain spray and spray it right then and there, before putting it into the laundry piles.  It is a work in progress, and I believe it will take many years before I see any fruits of my labors.  Laundry can be a full-time job if you allow it to be.  One thing that helps is to make sure you don’t have more clothes than what your kids can wear.  We’ve been blessed with a lot of hand-me-downs.  Every so often I go through things and get rid of the unrepairables and take out the duplicates or the unused clothes and send them to the donation pile.

100_5572

This is our spare sock basket… When I have spare socks, I just put them in this basket. Every so often I go through it and have a sock matching party. It has helped out a lot! I’m so amazed at how easily socks get lost!  The green paper is a basic washing instruction list for the kids… in case they have questions!

100_5573

With three shelves, I have room for 9 different piles if necessary. Three to a shelf. I can also use hangers to hang clothes on these shelves if I need to hang something up!

100_5574

Just another view… again, don’t look at the nail holes… ahem! You can see some of the hooks on the other wall. I have two sets of those and they are used for clothes that need to be ironed or air dried!

100_5577

There’s another shot at it. No fancy iron closet but this works for us. It’s easy access and works great.

100_5570

More shots of the upper shelf unit holding baskets.

Over the years, I have acquired these baskets either at Walmart or the DI, rather cheaply.  I have one for each ROOM in the house–it lives in that room’s closet so as to not be seen–plus I have three extras.  Ed and I are the only ones that have our own baskets.  I have two sets of boys that are nearly the same size and share rooms, since they share clothes, they share a basket.  On Mondays, Wednesdays, and Fridays, each basket is to be brought to the laundry room for washing.  In case you’re wondering, there is a chore chart that assigns a child as a laundry helper — so each child gets the chance to take a turn helping with washing and sorting end of things as well!  Hopefully they’ll learn to do it right!!!

100_5578

Here, all the baskets have been brought down and the clothes piles have been put in their baskets. I should say that each basket has a name on it written in marker. If I find shoes out, or belts or any other of their miscellaneous belongings that belong to the kids, they get put in their basket as well. At the end of the day, it all goes to their rooms.

When the clothes are washed, they are folded, IN THE LAUNDRY ROOM, and placed on these wire shelves I’ve installed–I know they are not custom built-ins, but this has helped me out so much!!  I never knew how nice it was to have a place right there to put folded clothes on. The hooks on the walls are for shirts which need to be ironed or anything that might need to air dry.  When they get done in the dryer, all ironables go on the hook to be ironed on my iron day… usually on a Tuesday or Thursday, when I don’t have quite as much washing to do.  When the baskets are not in use, they sit above my washing machine.  When the clothes are all folded for the day, each child’s pile is put in their basket and sent to their room at the end of the day with any other of their other belongings that might be hanging around.  Each child is responsible for putting up their clothes and making sure their basket goes back into their closet.  We usually do sheets on Thursday, and play “catch-up” on Saturdays.  In essence, my laundry machines usually go every day of the week, when I’m on top of things.

So this is how things work for me!  Tell me how things work for you and if you feel like giving this method a try, let me know how it goes!  Hang in there!!!

Vinyl Tile Squares Put to Use!

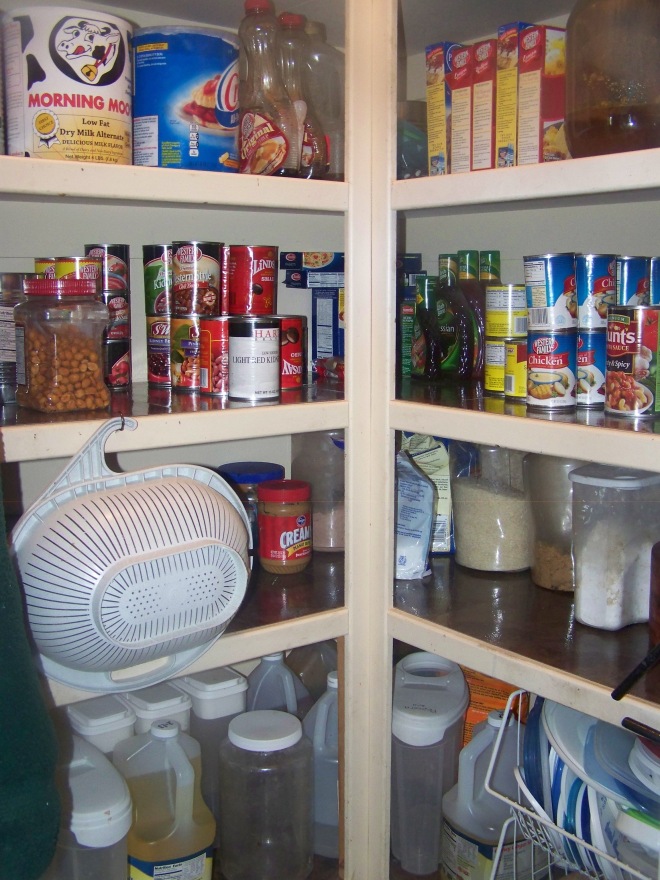
I sure wish I would have took a before picture, but there are somethings I will not subject myself to, and that is the humiliation of showing you what it looked like under my kitchen sink, AND, what my pantry shelves looked like.  SSSOOOO, after HOURS of cleaning out and scrubbing, we ended up with this little project!  We found those super cheap vinyl tile squares at Family Dollar.  We just peeled, cut and stuck them on the bottom of the cabinet and on the shelving in the pantry!  So simple!   I like how much nicer it is than the paper, which usually always rips and tears over time, AND it is super easy to wipe up messes on.100_5072

100_5073

100_5074

This is the cupboard under the kitchen sink, AFTER it is all done. SO much nicer! It looked so gross!

100_5065

Ooops! Someone got caught using the water jug while momma was busy workin’!

100_5061

That cute, little smile is going to get her in trouble someday!

Tiled Table Runner

100_5081

We have two simple and fast easy projects commin’ your way today!  I’m only posting two today because I’m not sure when I will get back on here!

First off, Ed and I have always admired tiled tables.  The ones that only have a few tiles here and there!  However, I am not all too keen on the idea of taking a router to my table.  The thought of having grout lines on my table for food to get caught in just does not make me happy, either.  I really wanted something that I can just put hot pots on and not have to worry about all the hot pads moving around with the pots.

I found some left-over 12 inch tile that was left over from our bathroom floors when we built.  I didn’t have any felt, but I had some fleece material (left over from Halloween, obviously!)

I hot glued the fleece to the back of each tile, trimmed it up, and lined it up!  Looks kind of cool!  I might try to cover that end up somehow, either put some trim on it or something.  I think I will find some of those chair fleece circle pads.  I believe that would be a better option.  First, it would get the tile OFF the table so it would not transfer heat to the table, and second, it would make that edge look a WHOLE LOTTA better.  It is really bugging me that I am seeing those fleece parts under the tile.   However, it might be a while until I can go and get some of those and until that time, this will work for now!  I can easily take these tiles off when I don’t need them, while keeping my table top in tack!

100_5080

Now that I have my post all done, I just thought of something! I am going to replace the fleece with those felt padded circles that you can purchase to put on chair legs, to keep them from scratching the floors. I am not too keen on being able to see the fleece under the tile, and I want to make sure the tile is NOT flat on the table when I put something hot on it, in case the heat transfers to the table!

100_5082

100_5083

Well, we’ll play around with this one a little bit more and update the pictures when I get it all figured out.  I guess I am doing this blogging thing backwards!  Oh well!  I think it would look cool if you had different sizes, shapes and colors of tiles.  If you end up trying it, send me a picture my way!

Front Room Repurpose!!

So…. my small little 10×10 room got a repurposed overhaul this weekend.  I found this hutch on the classifieds and fell in love with it!  I, however, had a dinky little loveseat in my front room that really served no purpose, other than for my children to throw the cushions off from it!  So, the lady selling this hutch wasn’t getting any bites on it.  So, I asked her if she would be willing to give me one week to see if I could sell my loveseat, so I could purchase the hutch.  She did, and on the last day…. I SOLD MY COUCH!!!  Now, I know I was thinking of turning this room into a homework room, but since there is a lot of music in our home, I wasn’t completely opposed to turning it into a music room, exclusively.  It just needed something!  Well, it still needs a few things, but those will have to wait for a bit.  I am wanting to find a small rug and then put faux wainscoting on the bottom third of the walls.  How did we do?!?!?!  Now, I just need to get back to figuring out how to deal with the homework area and the sewing area….. and, I had better stop there…. at least for a while!

So here is the BEFORE picture:

100_3062

And now the AFTERWARDS:  Or IN-BETWEEN phase!

Sorry… I should have had all the lights on as well….

100_4937

Our music hutch! I can store LOADS of music in the bottom. Which is what I have desperately been needing!

100_4935

Goodness! I didn’t realize I was blurry! But we moved the piano to the other wall. It fits on this wall just a little bit better than the hutch wall!

100_4934

Ahh! There with the pretty lights! I NEED lamps! I have lamp issues…. I am always looking for lamps at the DI… I just took the rocking chair out of another room and it fits great!

100_4824

Room for lots more music in the bottom. This is just what we use on a more regular basis. In the drawer, I can fit all the penny whistles, recorders, metronome, band music, pencils, pens…. It is PERFECT for my needs!

100_4939

View from the front entry…. A little blurry as well. Some day I will learn how to take a picture! I just need to save up now and find me a rug for the floor and perhaps, I might do the faux wainscoting on the bottom third of the walls. Who knows! It might take another eight years! But I think we can be happy with this, now, useful room!

Baby Gate Tweak

Can you believe it!  After listing all my troubles a few posts ago…. My dad-blane computer decided to literally die on me.  I guess it was time.  It was nearly 10 years old and it had given this family a lot of use.  We knew its little life was coming to an end.  We had hoped that it would last  at least until after Christmas, but it was not to be.  However, after looking around on the classifieds, we found some young kid who was “gettin’ out of town” and heading to Cal-I-Forn-I-A!  Luckily for us, he was dumping his computer at a steal of a deal!  Can I just say this….. I love Macs!!  This baby is sweet!  It has Photoshop and LogicPro on it.  Two amazing programs that are twice as much the cost of what we paid for this thing.  I just need to find out how to use them!  AND, may I just say, how did I ever get along without I-Photo!  It is the only easy way to get photos off my camera and onto to the computer!

Anyways, enough on that.  I might try to do a few posts within the next couple of days, so please be patient with me.  I don’t do a lot of them, but it’s Thanksgiving and I’ve got some recipes and ideas I would like to post, so we’ll see how much time I have and IF I can do them!

My little girl is beginning to be mobile…. somewhat!  It is near!  She is scooting a bit and rolling and reaching for things.  When our last little boy was learning to crawl, he got familiar with the stairs a couple of times against his own will!  We had this baby gate, but with our carved newel post, it just wouldn’t fit.  I spent all my time trying to keep it straight.  Lifting other young children over the gate, and trying to keep it tight so that the baby couldn’t crawl up to the gate and push it over and have another fun visit with the full set of stairs.  What could I do!  I looked at some other gates online and they were insanely expensive.  My Sweetie came up with a wonderful idea!

We took the gate and a piece of old oak that we had taking up some space…. I was too impatient to paint it, and since this is my last baby, I probably won’t every paint it!  Oh well!  Such is my life!  We had some old door hinges out in the garage.  We screwed the hinges onto the gate and then placed them on the wood.  We screwed the wood into the studs.  Now the gate can be handled with one hand.  It fits in-between the newel post and the first railing.  I usually take some soft fleece and wrap my newel post where the gate hits and just duct-tape it there while the gate it up so that the gate does not damage the wood.  My younger kids can handle it easily and it is tight and secure.  When it is not in use, the gate just swings up against the wall and usually stays close to the wall–when the kids aren’t swinging it open and closed.  Best thing about this, when we take the gate down, there are only two small screw holes.  Easily patched up.  We took the gate out of storage this past weekend in anticipation of our little girl getting on the move.  We saved so much money and have one of the most easily handle child gates out there!

EASIEST Method to Clean Window Blinds!

I know…. I know…. School has started and I still don’t have time to be on here!!!  In fact, I have LESS time to blog than ever before!  There’s no one to entertain my little baby anymore…. go figure!!  Anyways, I just wanted to drop a quick one for you and my batteries to my camera just died, so I can’t post my actual photos just yet….. I’ll post them when I can get some good batteries on here and I am in a super, fast hurry this day!

We have family coming this weekend and it feels like I am doing Spring cleaning in the Autumn!  My blinds are HORRIBLE this season.  They have been putting in a sewer and there have been tractors and you name it everywhere!  DUST GALORE!!!!  We have those 2 inch faux wood blinds…. Are they not a pain in the backside to clean????

Solution:  Take your blinds and put them in your tub… fortunately, I have a “garden” tub that has jet holes or bubbles as my kids like to say…. I haven’t tried it on a normal tub, but I don’t think it would make too much difference, perhaps just use the shower option.  I put the blinds in the tub, filled it up past the bubble holes with hot, hot water; poured in a goodly portion of Clorox, then turned on the bubbles!  I then walked away and let it soak and bubble for about 30 to 45 minutes.  It even cleans the cord pulls that somehow turn so black because of the heavy use they get.  It is seriously the easiest method of cleaning blinds!  I’ve used it for several years in my home.  So simple!  I’ll have to try it on our other tub… without the bubble holes just to see how well it works with that one.

Let me know how it works for you!