Breakfast Biscuits with a Twist!

IMG_20140523_061714
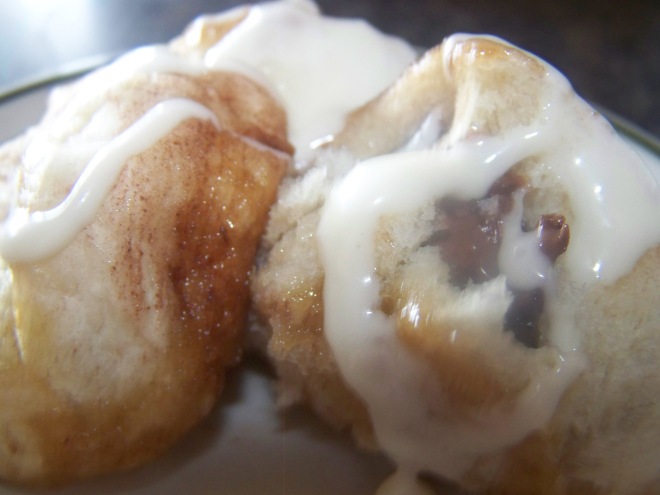
My son has been taking early morning Driver’s Ed for the past five weeks. In order to make his busy schedule, we have been eating hot oatmeal every week day. One day, I could take NO more MUSH!! We finally had a morning where someone didn’t need to be somewhere by 6:15 a.m. I decided it was time for something different! I’ve heard of people taking refrigerated biscuits and trying something with cinnamon and sweetened condensed milk. I didn’t have any of that stuff, but I have my biscuit recipe, which I love.

I simply doubled my recipe. I took a muffin tin and put a drop of butter in the bottom of each one. I divided the dough into twenty four dough balls, (a normal batch would only make twelve) then I divided each ball into three more small balls. I took each little ball and dipped it in cinnamon sugar (the other set, I dipped in hot cocoa drink powder mix).  Each muffin got three little dough balls.  I then put a little bit of butter on the top of each biscuit muffin. I baked them in the oven at 375 for about 17 minutes or so. When they came out, I drizzled sweetened condensed milk all over the top of them…. They did NOT last long at our place!

I had children thanking me right and left….. not only where they happy to not have to eat another bowl of mush, but they absolutely loved this new breakfast twist!

Cinnamon Chip Swirl Bread

20140508_125610

OK!  I have been wanting some cinnamon bread since a neighbor of mine brought some over to me a couple of weeks ago.  I have to admit, it is a HUGE addiction for me!  There’s just something about hot cinnamon bread!   Mmmmmm!

Today I wanted to try it out.  So I made my simple bread recipe today.  I divided my dough up into my five different loaves.  I gently flattened (just a little bit) each piece out (as though you were making cinnamon rolls or pizza).  I GENEROUSLY covered it with a cinnamon/sugar mixture.  I then added a handful of cinnamon chips on top of that–A while back, I found a bag at my local grocery store by the chocolate chips.  They were quite pricey, but I only used a handful, and since my children don’t care to eat them as candy, they have actually lasted a while.  I can probably get a few more batches out of it!!  I then folded, rolled, and shaped my bread loaves.  I baked it just as I did my regular bread and it came out HEAVENLY!  Spread a little butter on a hot slice of loaf and man o man!  Good stuff!  I gave a slice to the repair man who came to fix my dishwasher!  It was a thumbs up!

Let me know how you like it!


Chocolate Chip Pumpkin Cake with Streusel Topping!

103_0947I am in serious trouble when it comes to breads…. that will undo my last years 40 lb weight loss if I am not careful!!  Good thing there are lots of mouths at our home, that way I am not inclined to eat it all!  I have found a lot of recipes for Chocolate Chip pumpkin bread.  Well, my bread pans were being used, so I thought I would just make a cake!  It worked out Wonderfully!!!  We cut up a hot slice for lunch yesterday, put it in a bowl, and poured some milk over the top of it, and it was out of this world!!

My recipe is slightly adapted from one I found on All Recipes… I don’t even know where I found it, so if it is yours, please take the credit!

3 C sugar

15 oz of canned pumpkin puree

1 c vegetable oil

2/3 C butter milk — I put about a tsp of lemon juice in with regular milk and give it about 5 to 10 minutes when I need buttermilk

4 eggs

3 C flour

1 Tb ground cinnamon

1 Tb nutmeg — I only had Allspice so I used about a 1/s Tb of Allspice

2 tsp baking soda

1 1/2 tsp salt

An entire bag of milk chocolate chips–fold these in with spoon.

Streusel Topping:

1/4 C of soft butter

1/2 C of brown sugar  — you want more sugar and flour than butter or else it will all sink to the bottom of the loaf

1/4 – 1/2 C of flour

1 tsp cinnamon

1/4 – 1/2 C of oatmeal

Chopped nuts — as many or as little as you want

Mix it all together with a fork — You want it sort of on the dry side so that it will not sink…

Mix the cake ingredients together.  Grease and flour your pan really well…. or your bread loaves whichever you want to use.  I really like the cake method.  Spread it into the pans and sprinkle the Streusel topping over the top of it.  This topping is what makes this cake!!  Mine probably cooked about 45 minutes to an hour…. I started with 35 minutes, found out it wasn’t cooking thoroughly yet, so I turned my temperature down to 325 and it cooked for about maybe 15 or 20 minutes more.  So about an hour… I’m sorry I didn’t watch it more carefully.  My 14-yr old son begged and pleaded with me this morning that I would save him a piece for when he got home from school today… you have to understand that at our house, something like this usually doesn’t last too long!  I hope you’ll enjoy it!

Best Homemade Bread–EVER!

103_0949

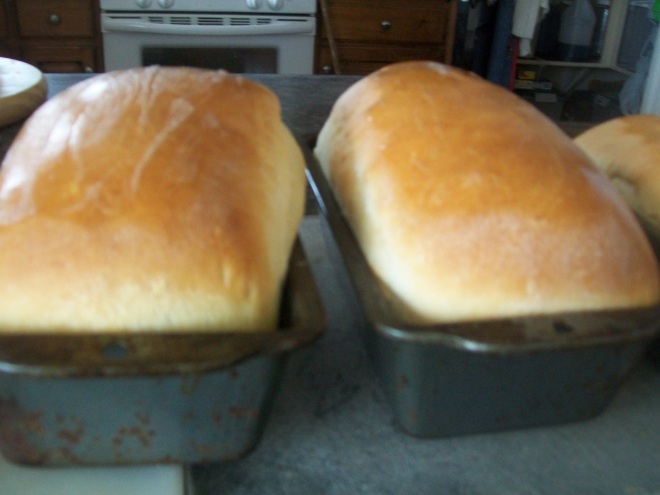
Fresh out of the oven with a layer of butter just smothered over the top!

As my children grow and become busy, and with the demands of keeping up a home–(cooking & laundry for nine people), helping with homework, Young Men and Young Women, Cub Scouts, merit badges, Jazz Band gigs, orchestra and play auditions, and most importantly, trying to keep our spirits fed by studying the gospel and serving in church callings, I am finding it increasingly more difficult to keep up a blog!  As it should be, my priorities are with my church and my family, and not my blogging!  You may not get too many posts this next little while… There are a lot of things happening this Spring and Summer–I’m super excited to face each new challenge and experience coming my way, but I will be quite busy for sure…. We’ll see how things go!

Having said all of that, Wednesdays at my home, are kitchen days!  It is a day that that I am trying to focus on my kitchen…. cleaning the fridge and oven, organizing the pantry, baking, etc!  I had to make some bread yesterday because we were all out, AND, while cleaning out the fridge, I uncovered a can of pumpkin that needed to be used up before it went bad on me.  SOOO, with that in mind, you are going to get TWO posts today (Homemade Bread & Pumpkin Chocolate Chip Cake)….because I simply can not guarantee with the next one will be…. I wish you could have smelled the aroma from my home yesterday while these breads were baking….it was HEAVENLY!  But alas, it was not to last long!

Anyways, a few years back, my dear friend Emily gave me this bread recipe, and I have seriously never used another recipe since then!  I simply LOVE this one.  It is so easy and it really doesn’t take up all that much time.  I’m just going to give you the recipe and a few quick pointers, because I have so much work that needs to be done today.  I hope you will enjoy it!  Let me know if you try it and it if works out for you!  This recipe makes two loaves….When I double it, I can get out 5 loaves!

2 C Water

1/4 C Butter

Put these in a microwave for a couple of minutes so that the butter is melted and the water is hot–let it set for a while to cool slightly while you prepare the yeast and flour mixture.

1 C warm water

1 T yeast

1 T Sugar

Make sure your water is very warm, but not scalding hot–sprinkle the yeast over the water and sugar over the yeast.  Give it a good mix and let it sit for a few minutes.

In a large bowl, mix 6 C flour, 1 tsp salt, 1/3 c sugar or honey, 1/4 C powdered milk, 1/3 C gluten–(found on your baking isle in the stores–don’t skip this ingredient–it does wonders for your bread).

Add the hot water mixture and the yeast (make sure your hot water has cooled enough that it will not burn the yeast when you add the yeast to it). You may need to add a little more flour if necessary.  If you are mixing it in a mixer, add enough flour that when it is mixing, there is no flour on the side of the bowl…Then, cover it up and let it rise for about a half and hour or so.  Keep your house as warm as you can when you are baking with yeast.  It helps, trust me!

When it is done, spread a small amount of shortening on your counter top — do not use flour– you should have all the flour you need in your bowl… you don’t want to add more flour.  Fold and kneed it and shape it into your loaves.  Grease your loaf pans really good and put your bread into each one.  Cover the pans and let the dough rise for about another half an hour.  Preheat your oven up to 350 and let it bake for 30 minutes.

When it is all done, spread a layer of butter over the top of the bread.  Let it sit in the loaf pan for 10 minutes and then invert it to get the bread out of the pan.  It should slip out pretty slick!  Bread always slices better when it has had a chance to cool off… however, we seem to not be able to wait that long at our house for warm, fresh bread.  We enjoy every single tasty bite!  Let me know if you try it!
103_0948

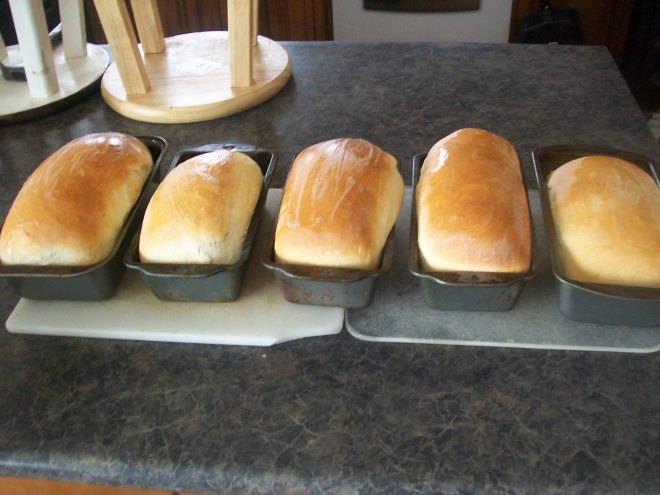
The lines you are seeing on the top of each loaf is the freshly melted butter I just swiped over the top of them!

Tasty Breadsticks!

100_4632

My husband Ed, is not one to throw too many compliments around when it comes to cooking.  He saves those for just a few dishes that he really likes!  HOWEVER, in the words of my husband, and my soon to be 10-yr old, “These are the absolute BEST breadsticks we’ve EVER had!”

I’ve decided it’s the seasoning…. I guess!  Anyways, we’ve made them successfully the last umpteenth times, so they must be down to a science!

Super easy, and don’t skimp on the seasoning…. it really is what will make this breadstick taste great.

Breadstick Dough:

Mix together the following and let it sit until bubbly:

1  1/2 C warm water

1 TB Yeast

1 TB sugar

While your yeast is “proofing,” mix the following dry ingredients together:

3 C flour (May need more)

1/2 tsp salt

2 TB sugar

Add your yeast mixture and stir until no dough is left remaining on the side of the bowl.  Let it rise until double in size.

Roll the dough out and cut with a pizza cutter into small strips.

Melt a cube of butter and dump it in a jelly-roll pan.  Cover the bottom of the pan with melted butter.  Dip each piece of dough into the butter and cover both sides.  Place them on your cookie sheet.

Here’s the seasoning trick:

Sprinkle with SEASON SALT, A generous serving of Garlic POWDER, Parsley Flakes, and Parmesan cheese.  Let them rise a little bit more and bake them at 350 for about 17 minutes.  Enjoy them….. every single one!!!!

Monkey Bread!

100_4639

OK..  I am writing this one down before I forget it!  I usually don’t experiment too much.  I never have good results.  I usually stick to other people’s proven recipes; then, if it doesn’t work, I can blame it on the recipe…. ahem!

However, I don’t know what came over me last night… Oh!  I remember!  I hadn’t eaten anything since breakfast and I was STARVED!  Enter in “experiment!”  And, luckily for you, it turned out FANTABULOUS!

The night before I had made a double batch of bread sticks.  I thought that I would cook half up and then put the rest in the refrigerator for Saturday.  Well, we were cleaning all day and I forgot I had it in the refrigerator.  At 6 p.m. everyone was begging me for food…. not good!  We usually eat much earlier on a Saturday.  Eating that late interferes with getting everyone ready for church and all the heavy house cleaning that goes on.  I really wasn’t in the mood for bread sticks, either.  So, I took the dough out and divided it into small dough balls.  I sprayed a muffin tin with cooking spray.  I took each ball, placed about a tsp of chocolate chips in it, rolled it into a ball, then dipped it into some hot cocoa mix that I had on hand.  I put three cocoa covered balls into each muffin whole.  I took about a half a cube of butter and melted it, then I just kept adding brown sugar to the butter until I got a thick, gooey consistency, then I poured that over the bread.  I baked them at 350 for about 18 minutes or so, and they were GREAT!

HOWEVER!  DON’T STOP THERE!!!

Had I had the ingredients and the patience to finish these little bad boys, I would have gone a little bit further!  The flavors would have been fantastic!  When you roll the dough into little balls, place a few chocolate chips into each ball, then roll it up and dip it in the dry hot cocoa mix (similar to chicken pillows–only chocolate pillows!)  I would have sprinkled a few nuts on them as well had I had any.  Then when they are all done baking and still nice and warm, I would have DRIZZLED cream cheese frosting on them!   But, we’ll save that for another time.  My diet thanks me for not doing all that!

After they finished baking and we had enjoyed a couple of them, I let them finish cooling completely before I placed them in a plastic sack and put them in the refrigerator.  I warmed one up this morning and it was perfect for a Sunday morning quick breakfast!

Breadstick Dough Recipe:

3 cups of flour (more if needed)

1/2 tsp salt

2 T sugar

In a seperate bowl add and mix the following:

1 1/2 C warm water

1 T yeast

1 T sugar

When your yeast mixture is all bubbly, add it to the flour mixture and mix well until no flour is left on the side of the mixing bowl.  Allow it to rise for about a half an hour.

This batch will make only one dozen, so, if there is only one or two of you, then you’re good; however, if your family is the size of mine, you might want to double or even triple it.

UPDATE:  I added the chocolate chips and icing and it was F-A-NOM-I-N A L!!!!

Lion House Rolls

100_4291

OK…. I was wanting something warm this Sunday afternoon…. We hit a high of 10 degrees and for the life of me, I simply can’t get warm! Imagine that??  I mixed these bad boys up before we headed out for Stake Conference this morning and they were all ready to go when we came home.  When we came home, I shaped them up, let them rise in the oven — a technique I learned from Jamie Cooks It Up, and then we were able to have nice hot rolls for dinner!  I have tried rolling them the traditional way, but I have never had a lot of luck doing it; but, I think I finally have the method down that works for me!  If you’ve never tried Lion House Rolls before, then you are really missing something!  The Lion House Restaurant is famous here in Utah for these amazing rolls.  This comes from one of their cookbooks.

Keep in mind, unless your family is as big as ours, you would probably want to half this recipe.  I make this size of a batch, and then put half of the dough in the fridge so that I can cook up another batch and have hot rolls for dinner the following day.

4 C warm water — you want it just barely hot….

4 tsp salt

2 eggs

1 1/3 C dry powdered milk

1/2 C sugar

2/3 C shortening or butter

4 Tbsp INSTANT yeast

10 – 11 C four (apx)

Mix the water and the milk powder in your mixing bowl — give it a good stir.  Add all the ingredients with the exception of the flour — Put in only four cups or so to begin with.  Give it all a good mix then start adding more and more flour.  I mix mine in the mixer and when the flour scrapes clean off the bowl, then you have enough flour.

Let the dough rise for an hour or two.  Then, put a little bit of shortening or baking spray on the counter top.  (I use grease rather than more flour when I mix it on the counter so that it does not get too much flour in it.)  I love how nice this dough mixes up and it is so easy to shape.

Preheat the oven to 170 degrees.

My favorite way to shape these rolls is just to break off small pieces and shape into balls.  Put them in a greased glass baking dish.  Gently smear a little bit of softened butter on the top of each one.  Place them in the preheated 170 degree oven for 20 minutes.  Without taking the rolls out, immediately turn the oven up to 350 degrees and bake the rolls for about 16 minutes or so.  When the rolls are done, spread just a little bit more butter on the top of the rolls.  They are amazing with honey butter — equal portions of honey and butter!

Be careful not to eat them all, because, now I have to do extra exercises in the morning to pay for my indulgence!

Yep!  Ed thought he'd sneak a roll while I was taking a picture!

Yep! Ed thought he’d sneak a roll while I was taking a picture!

Easiest Chocolate Chip “Cinnamon” Roll with a Twist!

OK… I know it is near 100 degrees outside….it has been for the last couple of weeks, and seven children are running around my house making messes faster than I can keep up with them; however, I simply could not WAIT for autumn/school time to make these.  After going most of the summer with simple stream line meals, I start getting the baking “itch.”  It usually hits around this time of the year.  Maybe it’s the hint of fall in the mornings or the anticipation of getting the kids ready for school!  What ever it is, my family has enjoyed it this week… a lot!  You would think that I have been starving them all summer long!

Anyways….back to the rolls… they are so simple, my 13-yr old nearly did them all on his own!  I have a weak spot for breads… not just any breads, but SWEET breads.  Cinnamon rolls will be the demise of my waist line if I am not careful!  Once again, somewhere out there, I found this recipe; If it is yours…you should receive a medal!  However, we have our own little twist that we do to customize these bad boys to suit our tastes!

That’s right!  You guessed it!  We’re adding CHOCOLATE!!!!

Chocolate Chip “Cinnamon” Rolls!!

In a bread mixing machine, or by hand, mix all the following ingredients and let ‘er rise ’til double in size!  It really is that simple!!

1/2 C warm water

1/2 C melted butter

1 package of dry vanilla pudding

2 C warm milk

2 eggs

2 Tb of either white or brown sugar

1 tsp salt

8 C flour — When you put it in your mixer, you know you have enough when the bowl has no flour in the bottom of it.

2 Tb INSTANT yeast

When your dough is doubled in size, take a small amount of grease and rub it on your rolling surface… not flour… If you put enough flour in your dough, you do not want to add more flour.  (Found this great tip from a dear little bread making queen!)

Take butter at room temperature, or very soft, and spread over your dough.  Sprinkle a good helping of both white sugar and brown sugar.  Sprinkle your chocolate chips and  nuts on it.  Roll it up, cut them up, and place them in a buttered/sprayed GLASS dish.  Trust me, I have had so much better luck with a glass dish than a metal one!

Once your rolls are in your dish, take your hand and gently flatten all the rolls… this will ensure that they will all rise to the same size.  Place them in a 350 degree oven and cook for about 17-20 minutes.

After about ten minutes of cooling, you can then put all the following ooey-gooey icing on them that you want:

1/2 cube cream cheese

1/2 cube warm/room temp butter

A dash of vanilla

A couple splashes of milk

Aprox 2 Cups of powder sugar!

Mix thoroughly with a mixer!

Stay with me….I know it sounds old fashioned, but this is really the best way to do it for me!!  I don’t think I have ever measured this one out!

This recipe will make approximately 24 rolls… I know it sounds like a lot, but in our house that doesn’t seem like much.  They can disappear pretty darn quick!  I would say store them in an air tight container, but ours have never lasted long enough to try that one out!  Let me know if they work for you!!  Happy baking!

Mouth Watering Biscuits!

Mmmm!  NO knife required!  They just pull apart!

Who doesn’t enjoy mouth watering biscuits!

I came across this recipe YEARS ago.  It was originally a traditional English Scone recipe.  They cut these into triangles, added chocolate chips and sprinkled the top with sugar before baking.  While those were divine, in and of themselves, I couldn’t help but think that, WITHOUT the chips and sugar, they would still make a pretty spankin’ good biscuit.  So I gave it a try.  I’ve only made one other biscuit recipe since then and I threw it out the window after trying it.  It couldn’t even come close to this one!

2 C of flour

1/4 C of powder sugar

1 T baking powder

Mix your dry ingredients together and then cut in 1/3 C of shortening or butter.  Then add the following wet ingredients:

1 egg PLUS enough milk to make 2/3 C of milk — Mix these two items together to equal 2/3 C of liquid, then mix it into your dough.

Do not overmix this recipe.  Use a fork and just barely incorporate the milk mixture into the dry mixture.  You want your dough SLIGHTLY sticky!

“Pat it out” on a floured surface… no rolling pin…. and cut out your biscuits.  I use a very small cup so I can get more out of one batch…. which works fine because my children don’t mind small biscuits.  I place mine CLOSE together in a glass baking dish.  I then bake them in a 450 degree oven for 13 minutes.

These biscuits provide just the right amount of “sugar to help the medicine of boring oatmeal to go down!”  They also work fabulous for biscuits and gravy.  Use them for any meal you like!

I hope you will try them and tell me what you think!

The Perfect Homemade Pizza!

Since today is Friday, I have to share with you our Friday tradition!  PIZZA!!! So, after many attempts to find the best pizza recipe, I think I have come up with it.  I uh, sort of forgot to take the picture BEFORE we enjoyed it… Sorry!  This blogging is still new to me!  I came across this recipe a while back.  I wish I could say where it was from, but I can’t!  So if it’s yours, it’s really a great recipe!  I like to make and prepare this in the morning, refrigerate it for the day, bring it out an hour or so before dinner to let it rise and then cook it at 425 for about 15 minutes.
5 C of Flour
1 Tb Sugar
2 Tsp Salt
1 Tsp Instant Yeast
2 Tb Oil
1 3/4 C Warm Water

I simply throw it all in my bread mixing machine and let it do the work of mixing it.  I let it rise for a couple of hours then start rolling it out.
I put a dab of oil on my snazzy $4 Walmart pizza pan, sprinkle corn meal on it, then put my prepared dough on it.  I  put a light layer of sauce on it, a heavy layer of Mozzerella, toppings, another light layer of Mozerella, then top it off with a light covering of
cheddar cheese.
Lots of good helpers!
Don’t mind the little tike pickin’ his nose!  Umm… yah, that one needed intervention before he could help mommy
some more!
Future Chefs!
It’s more fun to eat the pepperoni then put it on the pizza!
Little two yr old workin’ away!

When she’s all done, it looks like it came from a store!  In fact, as a test, I made some for my 13-yr old’s b-day party… his “buddies” all thought we had ordered out for pizza!  Our little secret!!

My sauce recipe came from the Food Nanny!  She is amazing!  This is probably the best and the easiest pizza sauce recipe I can think of.

1 – 2 Cans of Tomato Sauce
1 – 2 Tsp of Salt
Dash of Sugar
A dash or two of Garlic Powder, Basil, and Oregano

IF you have extra, store it in the fridge for the next time!
I hope you enjoy it!