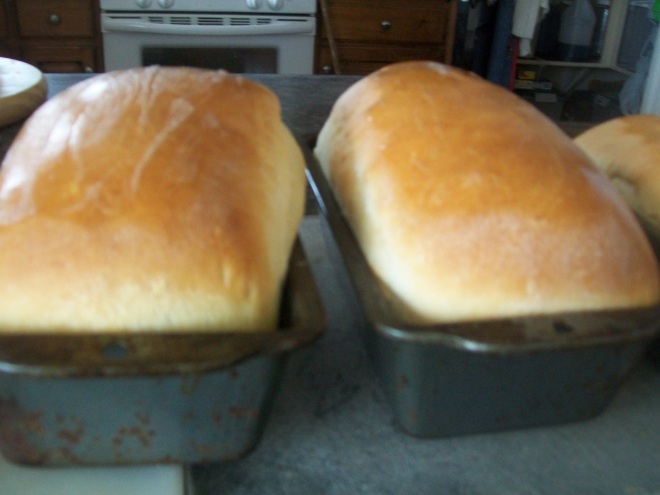
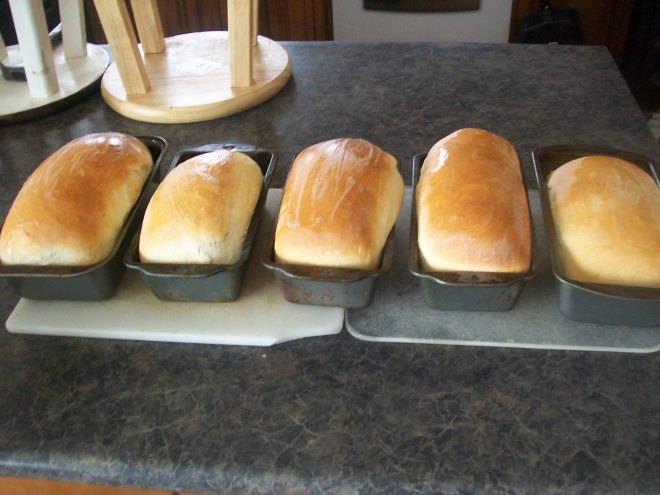
As my children grow and become busy, and with the demands of keeping up a home–(cooking & laundry for nine people), helping with homework, Young Men and Young Women, Cub Scouts, merit badges, Jazz Band gigs, orchestra and play auditions, and most importantly, trying to keep our spirits fed by studying the gospel and serving in church callings, I am finding it increasingly more difficult to keep up a blog! As it should be, my priorities are with my church and my family, and not my blogging! You may not get too many posts this next little while… There are a lot of things happening this Spring and Summer–I’m super excited to face each new challenge and experience coming my way, but I will be quite busy for sure…. We’ll see how things go!
Having said all of that, Wednesdays at my home, are kitchen days! It is a day that that I am trying to focus on my kitchen…. cleaning the fridge and oven, organizing the pantry, baking, etc! I had to make some bread yesterday because we were all out, AND, while cleaning out the fridge, I uncovered a can of pumpkin that needed to be used up before it went bad on me. SOOO, with that in mind, you are going to get TWO posts today (Homemade Bread & Pumpkin Chocolate Chip Cake)….because I simply can not guarantee with the next one will be…. I wish you could have smelled the aroma from my home yesterday while these breads were baking….it was HEAVENLY! But alas, it was not to last long!
Anyways, a few years back, my dear friend Emily gave me this bread recipe, and I have seriously never used another recipe since then! I simply LOVE this one. It is so easy and it really doesn’t take up all that much time. I’m just going to give you the recipe and a few quick pointers, because I have so much work that needs to be done today. I hope you will enjoy it! Let me know if you try it and it if works out for you! This recipe makes two loaves….When I double it, I can get out 5 loaves!
2 C Water
1/4 C Butter
Put these in a microwave for a couple of minutes so that the butter is melted and the water is hot–let it set for a while to cool slightly while you prepare the yeast and flour mixture.
1 C warm water
1 T yeast
1 T Sugar
Make sure your water is very warm, but not scalding hot–sprinkle the yeast over the water and sugar over the yeast. Give it a good mix and let it sit for a few minutes.
In a large bowl, mix 6 C flour, 1 tsp salt, 1/3 c sugar or honey, 1/4 C powdered milk, 1/3 C gluten–(found on your baking isle in the stores–don’t skip this ingredient–it does wonders for your bread).
Add the hot water mixture and the yeast (make sure your hot water has cooled enough that it will not burn the yeast when you add the yeast to it). You may need to add a little more flour if necessary. If you are mixing it in a mixer, add enough flour that when it is mixing, there is no flour on the side of the bowl…Then, cover it up and let it rise for about a half and hour or so. Keep your house as warm as you can when you are baking with yeast. It helps, trust me!
When it is done, spread a small amount of shortening on your counter top — do not use flour– you should have all the flour you need in your bowl… you don’t want to add more flour. Fold and kneed it and shape it into your loaves. Grease your loaf pans really good and put your bread into each one. Cover the pans and let the dough rise for about another half an hour. Preheat your oven up to 350 and let it bake for 30 minutes.
When it is all done, spread a layer of butter over the top of the bread. Let it sit in the loaf pan for 10 minutes and then invert it to get the bread out of the pan. It should slip out pretty slick! Bread always slices better when it has had a chance to cool off… however, we seem to not be able to wait that long at our house for warm, fresh bread. We enjoy every single tasty bite! Let me know if you try it!


Silly question for a VERY new (and still practicing) bread maker… What kind of flour shall I use? Self rising? All Purpose? Bread Flour? Cake Flour? — Another question is: Salted or unsalted butter? (Not the butter you slather on top, the butter you put in the water and melt in the mircrowave). Also (just one more question) – Do you use all 6 cups of flour, and THEN, if needed, add a bit extra while mixing in your Kitchenaid? Or… is the 6 Cups of flour just a general amount, and you use a bit more or a bit less – depending on the dough? (By the way, if it makes a difference for altitude, I live in Northern Utah.)
Oh! Don’t worry about silly questions!!! I have asked many of my own silly questions!! That’s how we learn! I’m in Northern Utah as well! You know, I am not an expert… I just go with what I have on hand! I always use all-purpose flour because that is all I buy… some are very particular about bread flour, but I am not…. My butter is always salted, because I don’t like using the unsalted butter. I’ve never had it taste overly salty. And, I usually start with around 5 cups of flour and then start adding more as needed!! This recipe is very, VERY simple and there is nothing quite as wonderful as the smell of bread cooking in an oven and then cutting a hot slice and enjoying every delicious bite!!! I hope it works for you!
I make bread all the time, but i usually use half wheat and half white flour, would i need to use the gluten if I am using wheat flour?
I’m not a bread “expert” by any means. I have made it with half wheat flour and still used the gluten. The gluten just adds a really nice “elastic-like” texture to the bread. Very soft and chewy rather than crumbly. I would just experiment with it one way or the other and decide which way you like it best. As for me, I will always use the gluten because of the wonderful texture it gives it.
Any changes if you are using instant/quick yeast?
I haven’t tried instant yeast just yet… I just ran out of regular yeast the other day and I thought to give it a try using the instant, as that is all I had on hand. I won’t get to it for another day or so. I’ll have to let you know!
This looks delightful!! Just curious, though, how long do you knead it before shaping it and putting it in the loaf pans?
Fortunately, my mixer does a really good job at mixing the dough. When I get to it, I usually only have to knead for a few minutes.
No kneading when you first mix it? Did I read that right? You mention kneading after the rise. How long?
I let my bread mixer do all the work. When it is all mixed together, I leave it in the mixing bowl, cover it with a towel and then let it rise. On occasion I will let it rise two times, but only if I’m in the middle of something and I can’t get to it right away. Generally it only gets one rise. Then I just take it out of the bowl, spread the shortening on the counter top and knead it for a few minutes, then shape it into the loaves. It is really super easy and if you make bread enough, you will quickly be able to tell how much kneading it will need! I hope it works for you!
Finally! A non-bread-machine recipe! Trying this this week! Of course, I’ll have to try it first without the gluten- just how I am. Want to see the difference! Then next week I’ll try it with gluten! 🙂 Thanks again for sharing… CTR! ~Mrs. S.
Let me know which way you like it best!
What size of pans do you use? I have two different size pans and curious as to which ones to use! I’m not much of a baker and just starting to make my own bread and trying to find the perfect recipe. Can’t wait to try it!
I just use the ones my mother used to have… they are about 8.5″ by 4.5″. Then as I started making more bread, I needed more so I found some at Walmart… they’re slightly larger..probably about 9″ x 5″.
Thank you!
Pingback: 103_0949 | FOODIEZ-eatzFOODIEZ-eatz
Why does the flour need more gluten? I have never used it when making bread, but I have never used dry milk. I do love a good bread recipe.
I did a little research so I would not steer you in the wrong direction: “Vital wheat gluten is like a super-powered flour that is all gluten and very little starch. It’s not technically flour itself, but it’s made from wheat flour that has been hydrated to activate the gluten and then processed to remove everything but that gluten. It’s then dried and ground back into a powder.
Because it’s almost pure gluten, a little goes a long way to improving the elasticity and rise of the raw dough and the crumb and chewiness in the final loaves. Most baking sources recommend about one tablespoon for every 2-3 cups of flour.”
I know that when I use it, the bread is much more chewier and a bit more “elasticity” like in texture. Bread doesn’t seem to crumble as much. I love using it in my bread. I have been using it for such a long time, I can tell when bread doesn’t have it in there. I hope it works for you! We love it!
Thank you, good enough for me.
Have you ever tried this in a bread machine? I probably would need to halve the recipe since it only does one loaf at a time. Just wondering if you think it would work there too, even if I only just use the dough setting on the bread machine. This sounds like a wonderful recipe!
I’m afraid I haven’t! I gave up on bread machines a long time ago…. one loaf was not sufficient for our sized family.. but from what I know of them, I don’t see why it wouldn’t work..just set it on the dough setting! You’ll have to let me know how it works out for you!